- North Indian Cooking....By Geeta Seth
- Recipes - Index
- Reference to Spices and Herbs
- Dals / Lentils
-
DAl / Lentils - Index
>
- About Dal/ Lentil's - Indian Dal Preparations
- Tadka
- Maa Ki Kali Dal
- Dal Makhani
- Masoor Dal
- Moong dal with spinach (Palak with moong dal)
- Chana Dal
- Moong Dal with Spinach (Palak Dal with Yellow Moong Dal)
- Moong Dal (Split and skinned yellow Moong Dal)
- Maharni Dal (Black urad, chana Dal & kidney beans mixed)
- Red split Masoor Dal (Malka Masoor dal)
- Split Black Urad Dal
- Sprouted Moong Dal
- Split Green moong Dal
- Panchratan Dal or Panchmel Dal ( (Five Dal Mixed )
- Trevti Dal (Toor Dal & Moong Dal & Chana Dal Mix)
- Masala Tadka Dal (Arhar dal or Toor Dal)
- Toor Dal & Masala tadka dal (Arhar Dal or Pigeon pea)
- Toor Dal (Arhar Dal)
- Urad Dal (white urad dal)
- White Urad and chana Dal mix
- Whole Green Moong Dal
-
DAl / Lentils - Index
>
- Beans
- Rice and Pulao's - Index
-
About rice and pulao
>
-
Rice and pulao's
>
- Rice and Pulao's - Index
- Chicken Biryani
- Shrimp Biryani
- Rice with caramelized browned onions
- Vegetables and paneer Biryani
- Boiled white rice
- Boiled white rice
- How to cook rice on stove
- How to cook rice on stove
- Arhar Dal with rice khichdi (Toor dal khichdi)
- Toor Dal with rice khichdi (Arhar dal khichdi)
- Black urad dal with rice khichdi (Maa ki dal ki khichdi)
- Urad dal with rice khichdi (Black urad dal khichdi, Ma ki dal)
- Moong Dal and rice khichdi
- Moong dal and dalia khichdi
- Kali dal ki khichdi (Black urad dal or Maa ki dal ki khichdi)
- Maa ki dal ki khichdi (whole urad dal khichdi)
- Sabudana Khichdi (Tapioca pearls)
- Muttar paneer pulao (Rice with green peas and cheese)
- Muttar pulao (Rice with green peas)
- Pulao with cauliflower, green peas and potatoes
- Vegetabale Pulao
- Tamarind Rice (Imly rice)
-
Rice and pulao's
>
-
About rice and pulao
>
- Meat Dishes - Index
-
Meat Dishes
>
- Meat Dishes - Index
- About the Indian meat dishes
- Beef Kebabs
- Beef Keema with Spinach
- Ground Beef shammi kebabs
- Beef Seekah Kebabs (Minced meat roasted on skewers)
- Beef Frankie (wrap)
- Beef with Spinach Curry
- Butter Chicken (Murg makhani)
- Chicken Curry
- Chicken Kebabs
- Chicken Keema with spinach
- Chicken Seekh Kebabs (Minced meat roasted on skewers)
- Chicken kebabs Stir fry
- Chicken Shami kebabs
- Chicken korma
- Chicken Frankie (wrap)
- Chicken tikka Masala
- Chicken with spinach curry (chicken saag)
- Palak Gosht (Beef with Spinach Curry)
- Chicken Saag (Chicken with spinach curry)
- Tandoori chicken
-
Meat Dishes
>
- Kati Roll
- Paneer dishes - Index
- About paneer
- Paneer dishes - Index
- How to make Paneer at home
- Butter Paneer (Paneer makhani)
- Crumbled paneer curry with green peas
- Kadhai paneer
- Muttar paneer (paneer with green peas)
- Paneer Curry
- Paneer tikka (Barbecued Paneer Kebabs)
- Paneer Bhurji (Scrambled Paneer)
- Palak paneer (spinach with paneer)
- Paneer Frankie (wrap)
- Paneer tikka masala
- Shahi paneer
- Tandoori Paneer Tikka Kebab
- Kofta - Index
- Vegetable dishes - Index
-
Vegetable dishes with gravy
>
- Vegetable dishes - Index
- About the Vegetables dishes
- Arbi with gravy (Taro roots)
- Aloo tamater ke sabzi (Potatoes with toamtoes curry)
- Aloo Muttar Ki Sabzi (Potato with Green Peas Curry)
- Aloo wadiyan (Potatoes with urad dal wadiyan)
- Besan Kadhi
- Bharwa aloo (Stuffed potatoes)
- Dum Aloo (Potato curry)
- Egg curry (Ande Ki curry)
- Mangories with Aloo, tamater (Moong Dal Mangories with potatoes and tomateos)
- Sarson Ka Saag
- Spinach with mushrooms
- Stuffed cabbage rolls curry (Bandh gobi ki rolls)
- Palak Mushroom curry (Spinach with Mushroom curry)
- Punjabi Kadhi (Besan pakoda kadhi)
- Pyaz ki Aloo (Potatoes with onion curry)
-
Vegetable dishes with gravy
>
- Vegetables side dishes - Index
-
Vegetables Side dishes (sukhi sabzi)
>
- Vegetables side dishes - Index
- About the vegetables
- Aloo baingan (Eggplant with potatoes)
- Aloo Gobi masala (Spicy Potatoes and cauliflower curry)
- Aloo Gobi masala (Cauliflower)
- Aloo methi ki sabzi (Potatoes with fenugreek leaves)
- Aloo Muttar sukhe (Sauteed boiled potatoes with green peas)
- Aloo Muttar masala
- Aloo palak ke sabzi (Potatoes with spinach)
- Arbi - Masala arbi (Taro roots)
- Bell Pepper stuffed with potatoes (Capsicum, Shimla Mirch)
- Bell peppers with onion and potatoes (Capsicums)
- Eggplant Bharta- Indian Roasted Banigan Ka Bharta
- Baingan Ka Bharta (Eggplant Bharta)
- Bharwa Baingan (Stuffed Eggplants)
- Bharwa Bhindi (Okra Stuffed with onion masala)
- Bharwa banana peppers - Banana peppers stuffed with potatoes
- Bhindi ke Sabzi (Okra)
- Cabbage Curry (Bandh gobi, patta gobi)
- Gajar methi ki sabzi (Carrots with Fenugreek leaves)
- Capsicum masala (Bell peppers)
- Gawar Ke Phalli (Cluster Beans)
- Gawar Ke Phalli (Cluster Beans)- 2
- Gobi aloo with onion & garlic (Cauliflower with onion, garlic & potatoes)
- Gobi ki bhurji (Grated cauliflower with Green Peas)
- Gobi aloo ki sabzi, Phool gobi (Cauliflower with potatoes)
- Gobi Musallam (Cauliflower)
- Green Beans (French beans)
- Karela Bharwa with masala (stuffed Bitter Melon)
- Lobia ki phalli (Green long beans)
- Kaddu Ki Sabzi (Yellow pumpkin curry)
- Lauki ki sabzi (Bottle gourd, Long Melon, Ghiya)
- Jera Aloo (Potatoes with Cumin Seeds)
- Jeera Aloo (Potatoes with Cumin Seeds)
- Mooli ki bhurji (White daikon radish bhurji)
- Methi Matar Malai (Fenugreek leaves, Green peas and Malai)
- Muttar aloo with tomatoes and onions(Green peas with potatoes,tomatoes& onions)
- Sangri, mooli ki phalli aloo ki sath (Dikon green beans with potatoes)
- Sem aloo ki sabzi (Flat beans with potatoes)
- Sem aloo ki sabzi (Green fava beans with potatoes)
- Sukhe Aloo ke sabzi (Boiled sautéed potatoes with masala)
- Masala Turaii (Zucchini with Masala)
- Turai ki sabzi (zucchini)
-
Vegetables Side dishes (sukhi sabzi)
>
- Salad - Indian salads
- Salad - Indian salads Index
- Kala Chana Salad - Indian Black Chickpea salad
- Cabbage salad - (Indian spicy Cabbage salad)
- Fruit salad - Indian spicy fruit salad
- Chickpea Salad - Indian spicy chickpea salad
- Corn Salad - Spicy Indian Corn Salad
- Kachumber Salad - Indian Cucumber, Onion & Tomato salad
- Mixed Bean Salad - Indian Mixed Bean Salad
- Sprouted Green Moong Salad - (Indian recipe)
- Quinoa Salad with Strawberries, Blueberries and Grapes
- Popular Indian Sweet dishes- Index
-
Desserts .. Popular North Indian sweets
>
- About Indian desserts
- Indian sweet dishes - Index
- Almond burfi (Badam Ki Burfi)
- Almond Halwa
- Besan ka Halwa (Gram flour Halwa)
- Besan ka ladoo (Gram flour ladoo)
- Boondi (Sweet Boondi)
- Boondi or Boondi Ladoo
- Boondi Ladoo
- Carrot Burfi (Gajar ki burfi)
- Carrot Halwa (Gajar ka halwa)
- Cashew burfi (Kaju burfi, Kaju katli)
- Coconut Burfi (Nariyal Ki Burfi)
- Gujia
- Gulab jamun
- Gluten free Gulab Jamun
- Kala Jamun
- Kheer (Rice pudding)
- Lauki Ka Halwa (Bottle gourd Halwa)
- Makhanna Kheer (Puffed lotus seeds pudding)
- Rasugalla
- Rasgulla
- Rasmalai
- Rasmalai
- Sabudana Kheer (Tapioca Pudding)
- Vermicelli Kheer (Seviyan kheer, Payasam Kheer)
- Shrikhand (Sweet Yogurt)
- Sooji Ka Halwa (Cream of wheat, Rava)
- Pista burfi (Pistachio Burfi)
- Phirni (Rice pudding)
- Petha
- Pumpkin burfi (kaddu ki burfi)
- Til ke Burfi (Seasme Seed Burfi)
-
Desserts .. Popular North Indian sweets
>
- Snacks and chaats - Index
-
Snacks and Chaats
>
- Snacks & chaats - Index
- About snacks and chaats
- Aloo Bonda (potato balls dipped in Besan Batter)
- Aloo Tikki (Potato patties)
- Besan sev (Gram flour noodles)
- Besan spicy french toast (Toast dipped in besan batter and cooked)
- Besan cheela (Gram flour pancake)
- Besan and sooji ka cheela (Gram flour & cream wheat pancake)
- Bread rolls stuffed with spicy potatoes
- Chola Aloo Tikki (Potatoes and chick peas patties)
- Chole Chaat - Indian spicy Chickpea Chaat
- Corn Chaat
- Fruit Chaat - Indian spicy Fruit chaat
- Kala chana chaat- Indian Black chickpea chaat
- Dahi Vada ( urad dal pakoras with yogurt)
- Dokhla Tips
- Besan Ka Dokhla (Gram flour dokhla)
- Moong Dal Dokhla
- Sooji ka Dokhla (Cream of Wheat Dokhla)
- Urad Dal and Rice Dokhla
- Gol Gappa (Pani Puri)
- Dosa
- Dosa aloo masala for dosa stuffing (Potato Dosa masala)
- Rava Dosa
- Sambher
- Idli
- Rava Idli (Sooji or Cream of wheat idli)
- Rava Masala idli (Masala idli)
- Hariyalli tikki or Hara bhara kebab
- Mathri (Crispy salty crackers)
- Gluten Free Mathri (Crispy salty crackers)
- Medu Vada
- Vegetable Cutlets (Mixed vegetable cutlets)
- Moong Dal Cheela (Moong dal pancake)
- Namkeen paras (Cispy salted crackers)
- Aloo pakoras (Potato fritters)
- Cauliflower pakora (Gobi ka pakora)
- Pakora with Green Moong Dal and potatoes (Fritter)
- Pyaz ka pakoras (Onion pakoras fritter)
- Mixed vegetable pakora - Fritters (potatoes, spinach & onion mixed)
- Potatoes and vegetables mix pakoras (Fritter)
- Palak pakora (Spinach pakoras)
- Paneer pakoras (Fritter)
- Chicken pakoras (Fritters)
- Papari / papadi Chaat
- Bharwa mirchi ka pakora (Stuffed green chilie fritters)
- Poha with green peas
- Potato Cutlet
- Potato paneer tots
- Roasted cauliflower
- Tandoori Gobi (Tandoori Cauliflower)
- Sabudana, Aloo Vada (Tapioca cutlet with potato)
- Samosa (Muttar aloo samosa)
- Shakkar paras (Sweet crackers)
- Sprouted Green moong chat
- Upma
- Uthappam (Rice & Dal uthappam) (pancake)
- Uthappam (Rava Uthappam) (Pancake)
-
Snacks and Chaats
>
- Chutneys
- Raita (Yogurt)
- Raita (Yogurt) - Index
- About raita and Yogurt
- Aloo, Dhai ka raita (yogurt with potatoes)
- Boondi ka raita (yogurt with boondi)
- Gajar ka raita (Yogurt with carrots)
- Kheera ka raita (Yogurt with cucumber)
- Lauki ka raita (Yogurt with lauki)
- Pudina ka raita (Yogurt with mint leaves)
- Palak ka raita (Yogurt with spinach)
- Yogurt with green onion, cucumber and tomatoes
- Breakfast dishes - Index
- Indian Breads (Roti, Paratha, poori)
- Indian Breads - Index
- About Indian Breads
- ROTI:
- Roti - Index
- Chapattis (Pulkha or Roti)
- Bajra ki Roti (Millet flour)
- Besan ki roti with onions (Gram flour roti)
- Lachha roti (Spiral Layered roti)
- Makai ki roti (Corn flour roti)
- Methi ki roti (Roti with Fenugreek leaves)
- Roti with Layers (Paratdar Roti)
- Roomali roti
- PARATHAS:
- Paratha - Index
- Aloo paratha (Potato stuffed paratha)
- Bajra (millet) ka paratha
- Besan ka paratha (Gram flour paratha)
- Gobi ka paratha (Cauliflower stuffed paratha)
- Lachha paratha (Spiral layered paratha)
- Layered Paratha (Paratdar Paratha)
- Makai ka paratha (corn flour paratha)
- Methi Ka Paratha (Paratha with Fenugreek leaves)
- Mooli ka paratha (Daikon stuffed paratha)
- Mughlai paratha
- Muttar Ka paratha (Paratha with green peas)
- Palak paratha (spinach paratha)
- Paneer paratha
- Urad Dal stuffed paratha
- Puri - Index
- Poori (Puri) :
- Poori (Puri)
- Methi ki poori (Poori with Fenugreek leaves)
- Muttar Poori (Poori with green peas)
- Palak poori (Poori with spinach)
- Poori stuffed with urad dal (kochari)
- Bhature
- How to...........
- How to make Garam masala
- How to make Ghee from Butter (Clarified Butter)
- How to make basic onion masala
- How to make & freeze onion masala in large quantity
- How to sprout mung beans (Moong Dal)
- How to sprout Black grams (Urad Dal)
- How to make yogurt at home
- How to marinate chicken
- How to make roasted Jerra powder (Cumin Seeds)
- Restraunt style curry gravy
- How to make Paneer at home (step by Step)
- Cooking measurement conversion
- Measurement Converter
Rasmalai
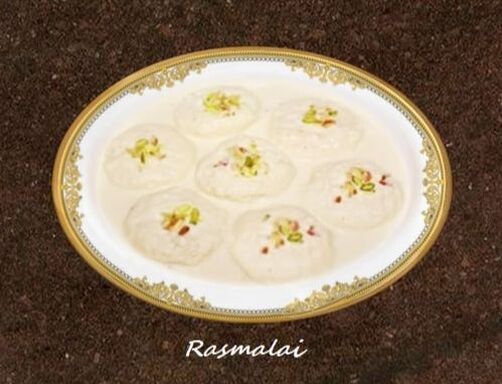
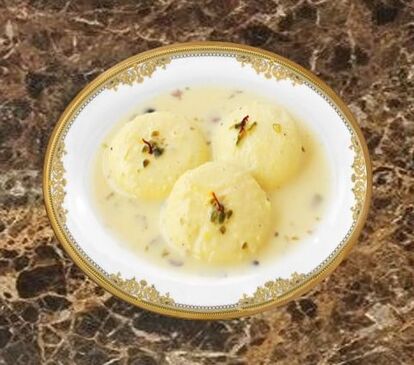
Rasmalai is one of the most popular delicious sweet dishes of India. This amazing dish is prepared with milk. The milk is first curdled and the chhena (paneer or cheese) is collected and why is drained off, then with paneer small balls are made and boiled. These balls are then soaked in sweetened, thicken, creamy milk flavored with rose essence and garnished with almonds and pistachio nuts.
Rasmalai is very soft and spongy in texture, and it melts easily in a person’s
mouth. You will fall in love with this sweet in first bite. Rasmalai is either white in color or yellow. It gets the yellow color if saffron is added in Malai for flavoring.
Rasmalai is usually served during many festive occasions and as a dessert after the main meals in Indian weddings. It is usually served chilled. Ras Malai can be made easily at home, the recipe of making the Ras Malai may look difficult and lengthy but it is easy to make.
Ingredients Rasgullas:
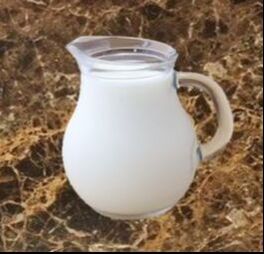
8 Cups 2% or whole Milk
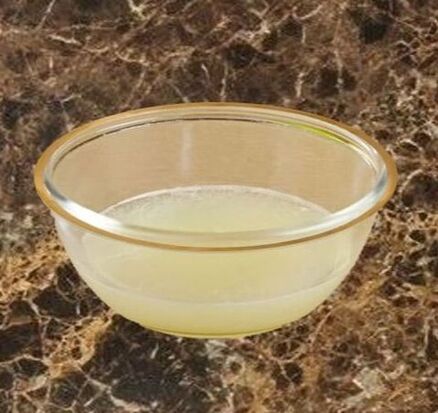
1/3 Cup of lemon juice or as required
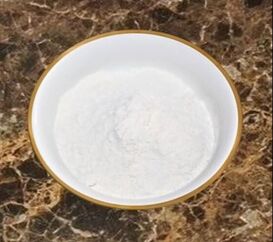
2 Tablespoons of all-purpose flour (Maida)
(Makes about 16 to 20 Rasmali)
Cooking measurement conversion
Measurement converter
8 Cups 2% or whole Milk
1/3 Cup of lemon juice or as required
2 Tablespoons of all-purpose flour (Maida)
(Makes about 16 to 20 Rasmali)
Cooking measurement conversion
Measurement converter
Ingredients for garnish:
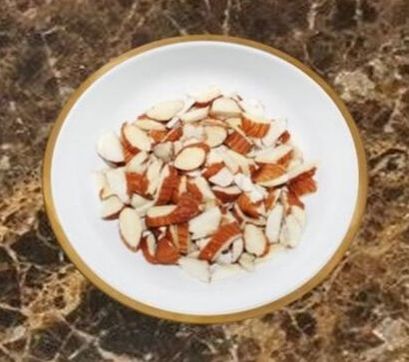
2 Tablespoons thin sliced almonds (optional)
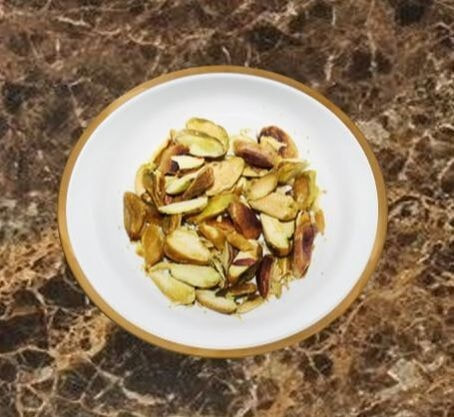
1 Tablespoon thin sliced pistachio (optional)
2 Tablespoons thin sliced almonds (optional)
1 Tablespoon thin sliced pistachio (optional)
Ingredients for Malai:
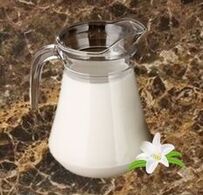
8 Cups of whole milk
¾ Cup sugar
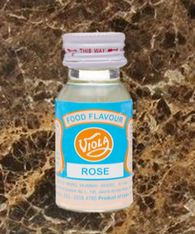
2 to 3 drops of Rose Essence (optional)
Few strings of saffron- Optional
8 Cups of whole milk
¾ Cup sugar
2 to 3 drops of Rose Essence (optional)
Few strings of saffron- Optional
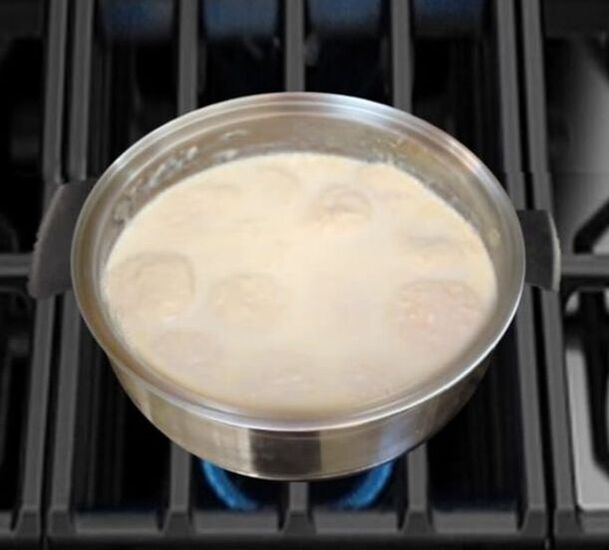
Directions for making the Malai : (Thick milk for rasgullas)
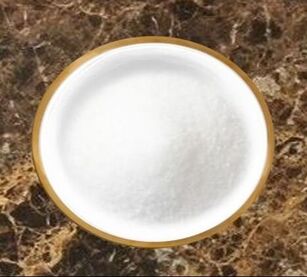
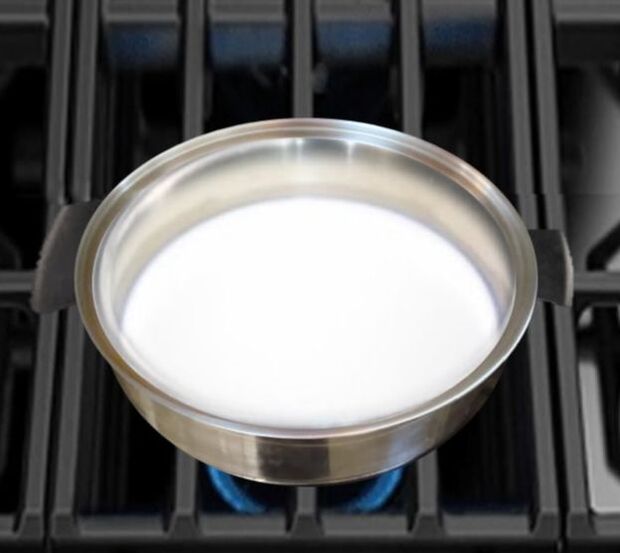
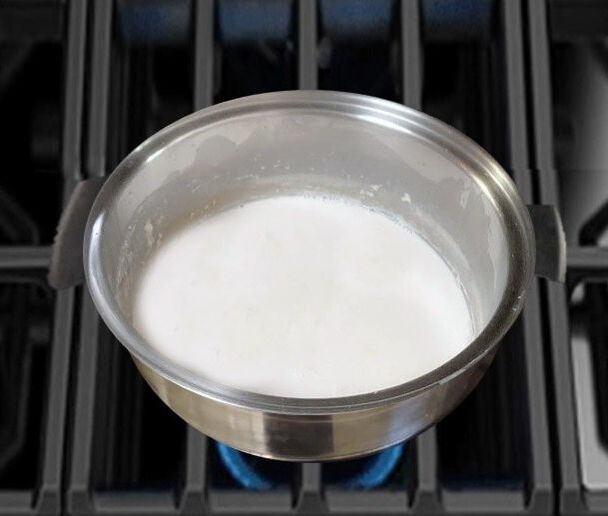
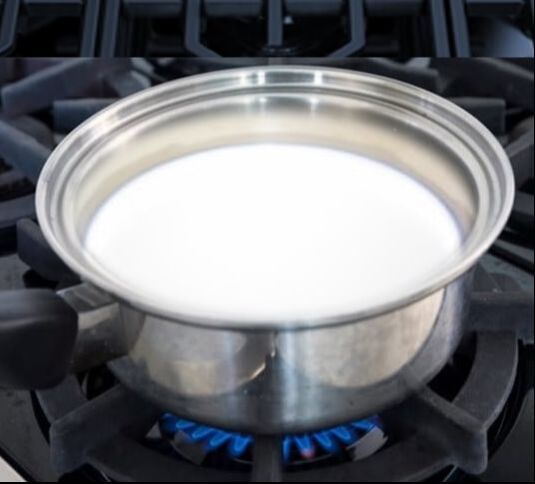
1. In a stainless-steel heavy bottom pan boil 8 cups of whole milk on low heat,
keep string periodically as milk tend to burn from the bottom.
2. Once milk start boiling keep the heat to low.
1. In a stainless-steel heavy bottom pan boil 8 cups of whole milk on low heat,
keep string periodically as milk tend to burn from the bottom.
2. Once milk start boiling keep the heat to low.
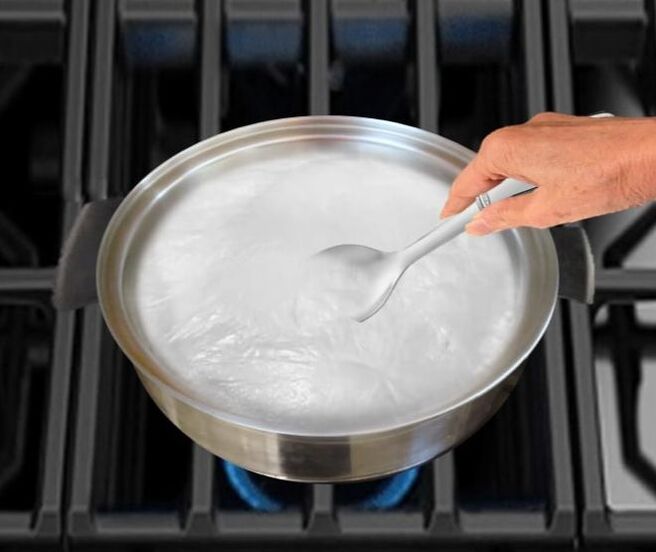
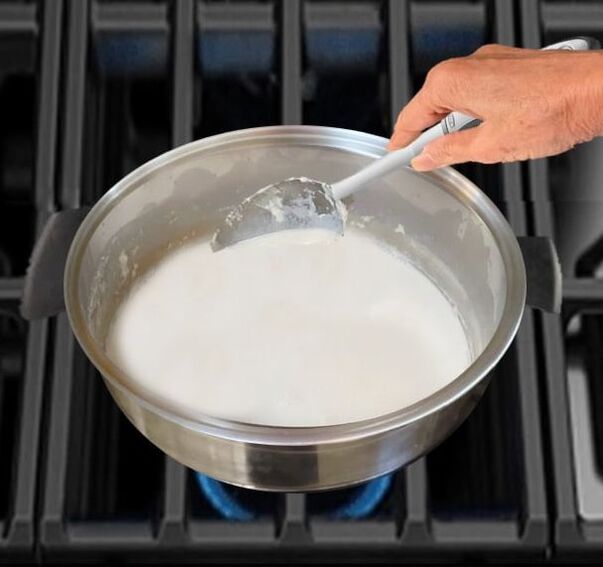
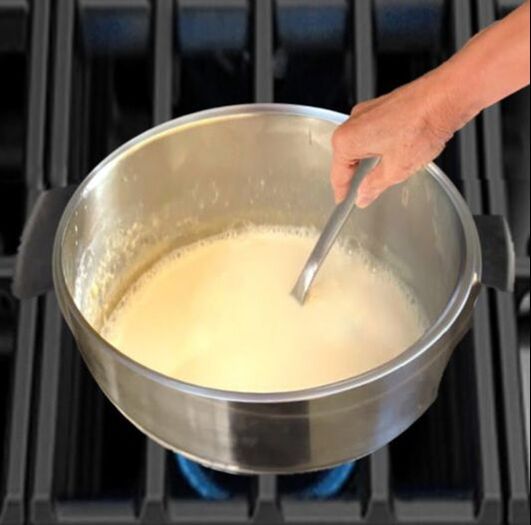
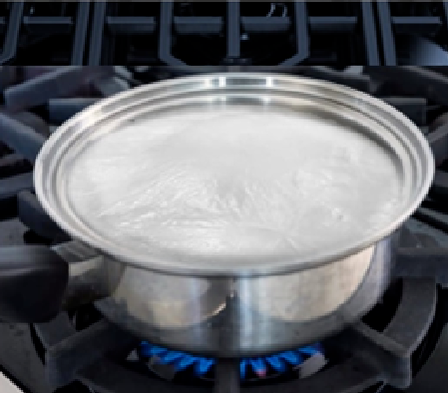
3. With a big serving spoon keep stirring the milk for a while so that milk stay
down in the pan, otherwise it will spill out of the pan.
down in the pan, otherwise it will spill out of the pan.
4. Turn the heat even lower, once milk settles down let it boil, stir periodically
and scrape the sides of the pan and collecting the cream layer on the sides and
add back into the milk
and scrape the sides of the pan and collecting the cream layer on the sides and
add back into the milk
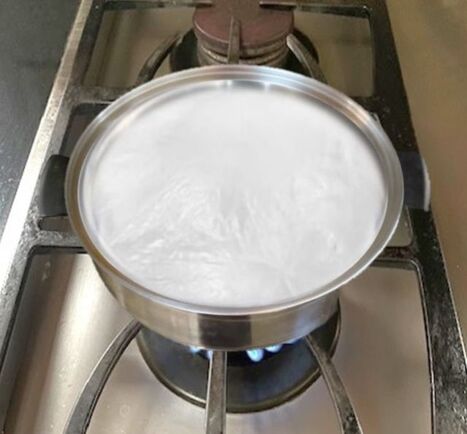
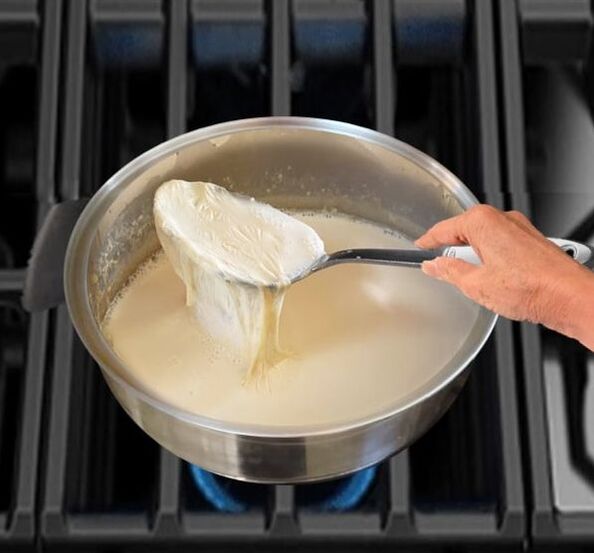
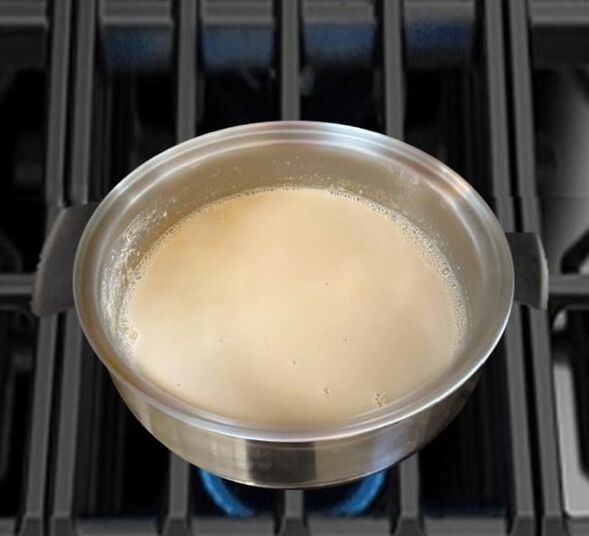
5. You will notice that layer of cream (malai) will start forming on top of the milk.
With a spoon or spatula give a gentle stir to the milk and then let it simmer
again.
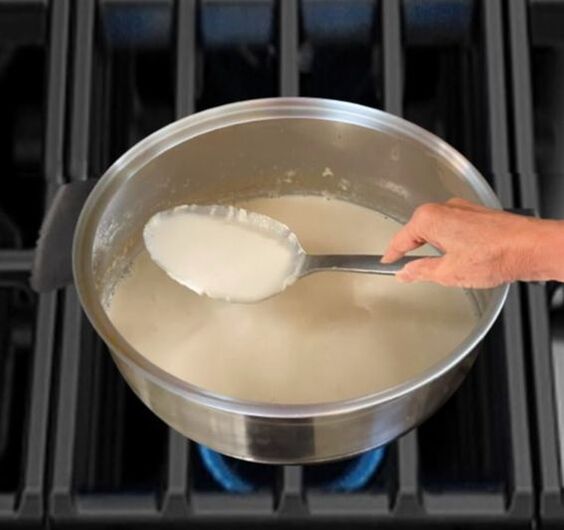
6. Keep doing this process until milk become thick.
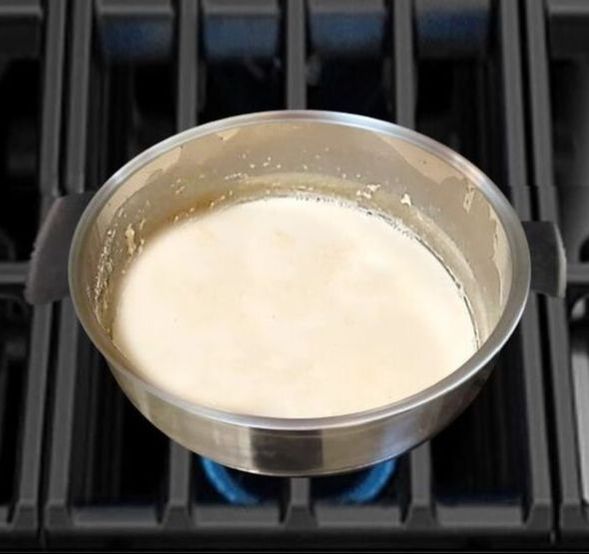
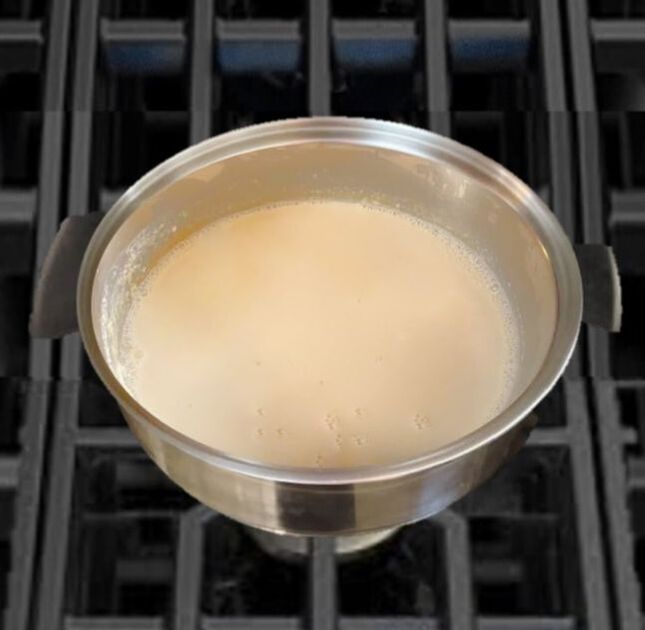
7. In about 45 minutes to 1 hour milk started to become thick it will become light
brown in color.
With a spoon or spatula give a gentle stir to the milk and then let it simmer
again.
6. Keep doing this process until milk become thick.
7. In about 45 minutes to 1 hour milk started to become thick it will become light
brown in color.
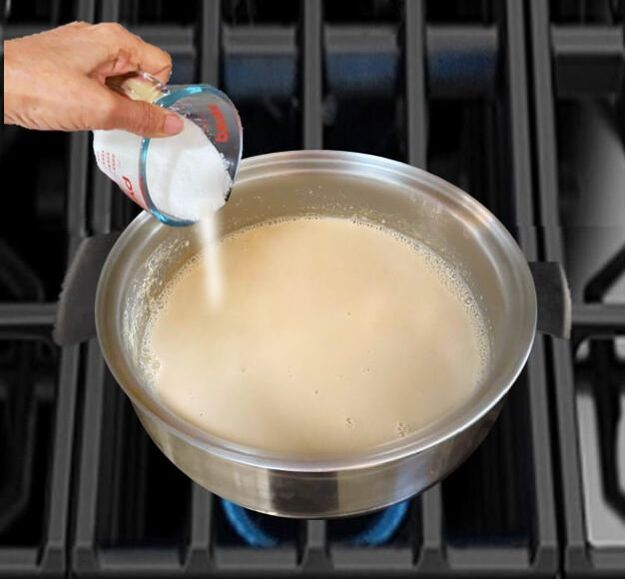
8. Boil the milk until ¾ of milk left. Once milk become thick to desired constancy
add ¾ cup of sugar and mix, boil for few minutes so that all the sugar dissolve
in the milk, turn the stove off.
add ¾ cup of sugar and mix, boil for few minutes so that all the sugar dissolve
in the milk, turn the stove off.
Directions for making the Rasgullas:
1. In a big stainless-steel heavy bottom saucepan boil 8 cups of milk on low heat, with a cooking spoon stir periodically because milk tend to burn from the bottom.
1. In a big stainless-steel heavy bottom saucepan boil 8 cups of milk on low heat, with a cooking spoon stir periodically because milk tend to burn from the bottom.
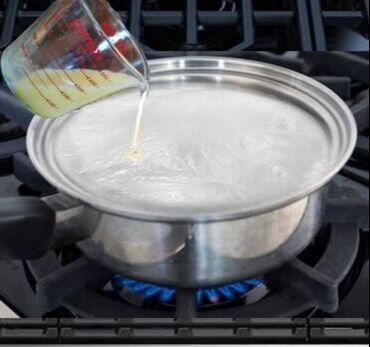
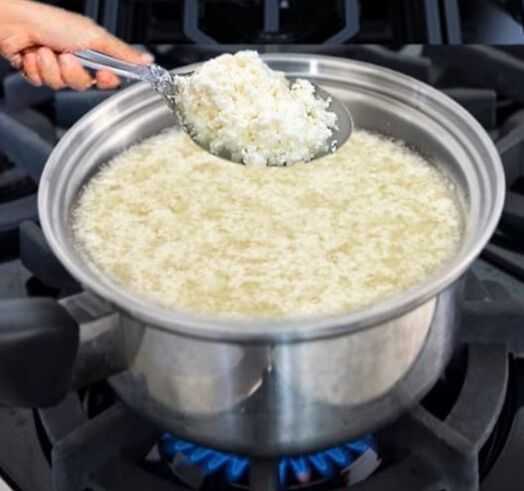
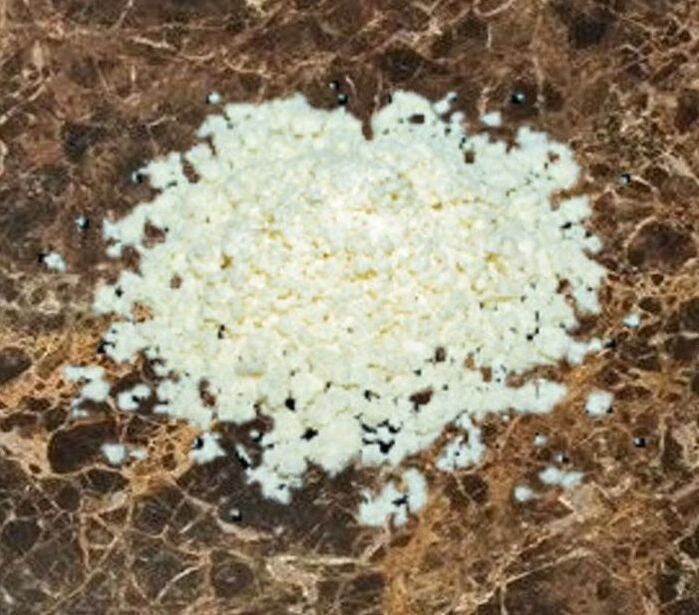
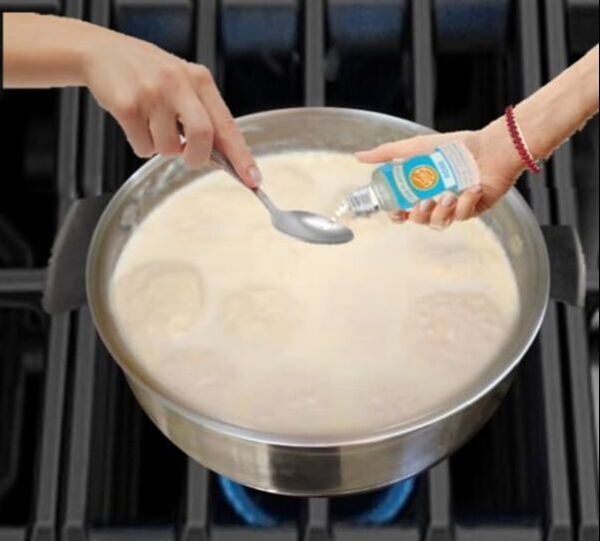
2. Once the milk come to a boil, add the lemon juice little at a time and keep stirring, until milk start to curdle and separate from the whey. Turn the stove off and let it stand for about 15 minutes.
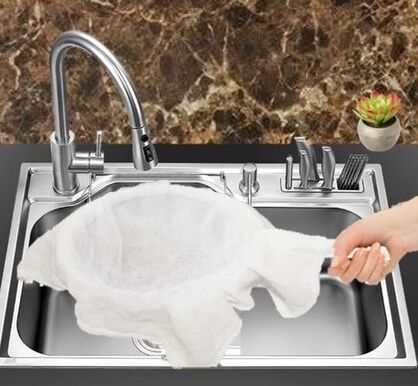
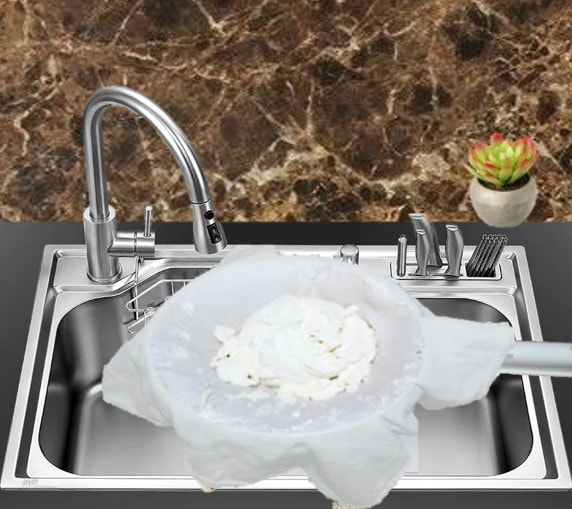
3. Take a cheese cloth or thin towel and line it over the colander. (With the cheese
cloth or thin towel, the whey flow out easily)
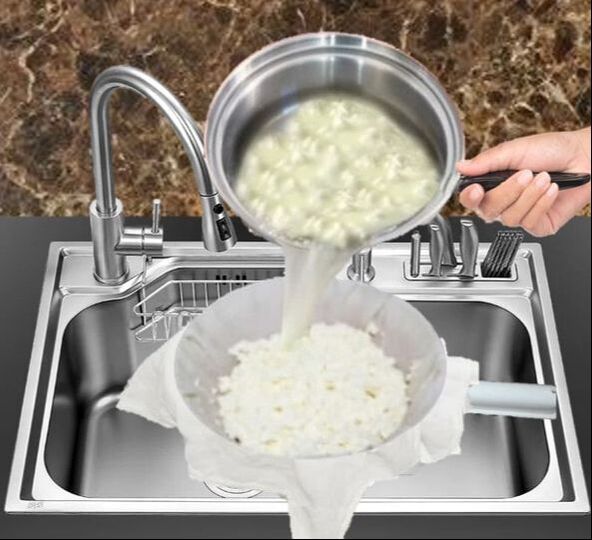
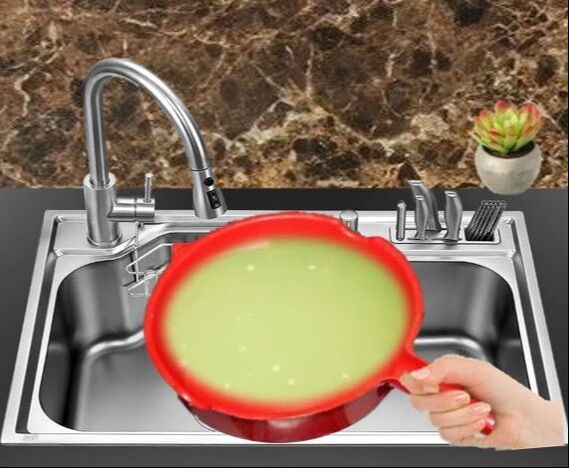
4. Place the colander in the sink, then pour the curdled milk into the colander and
let it drain.
cloth or thin towel, the whey flow out easily)
4. Place the colander in the sink, then pour the curdled milk into the colander and
let it drain.
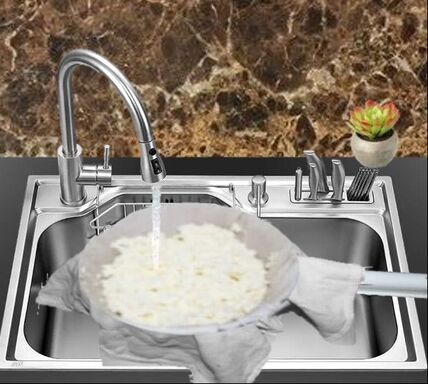
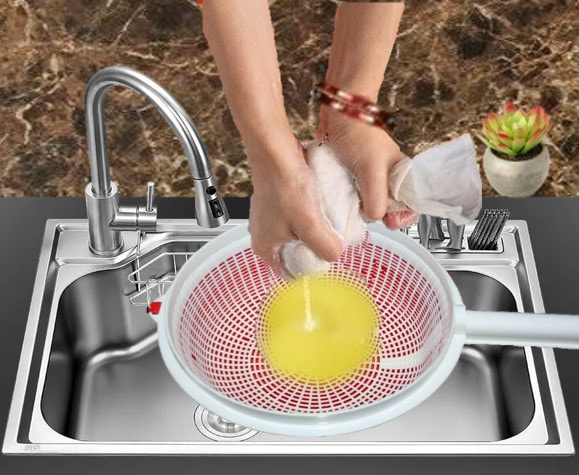
5. Wash the chenna (cheese) for few times in running tap water to rinse the
lemon juice out.
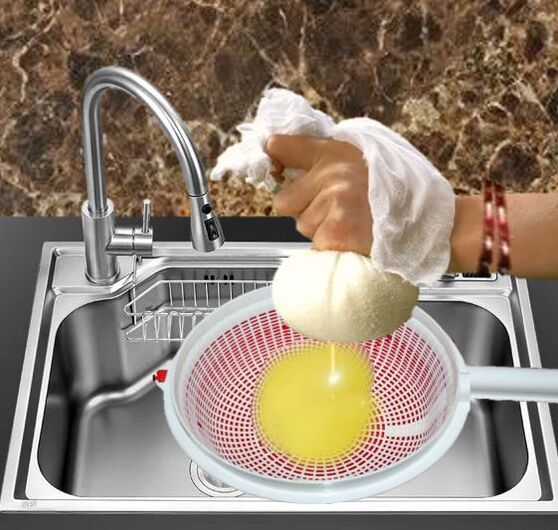
6. Lift the cloth off the colander, gather up the ends and twist and squeeze to drain the water out of the chenna, or gather the edges of the cloth and fold them over to cover the chenna and place it in the colander and fill a heavy pot with water and set directly on top of the cloth wrapped cheese in the colander and leave it aside until all the water drains out.
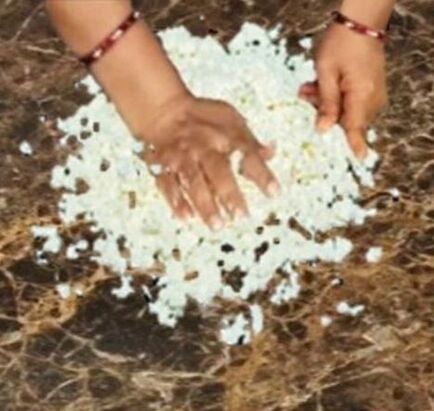
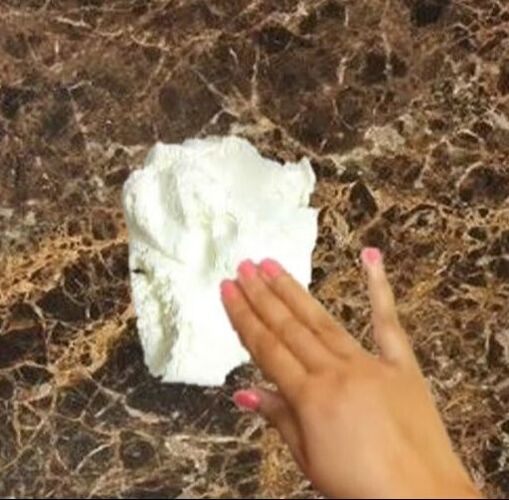
7. Once all the water drained out from chenna, take the chenna out from the
cloth and place over the counter or rolling board and start kneading
with the heel of your hand. (You could also use rolling pin to make chenna
smooth)
cloth and place over the counter or rolling board and start kneading
with the heel of your hand. (You could also use rolling pin to make chenna
smooth)
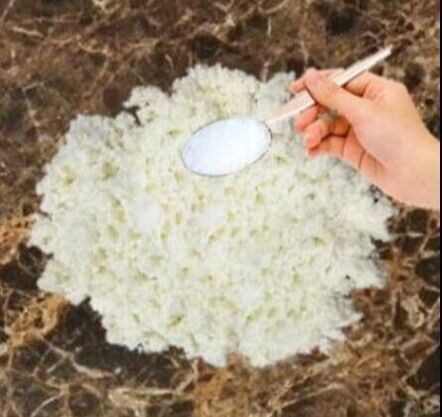
8. After kneading for few minutes add All-Purpose flour in chenna, and keep
kneading with the heel of your hand.
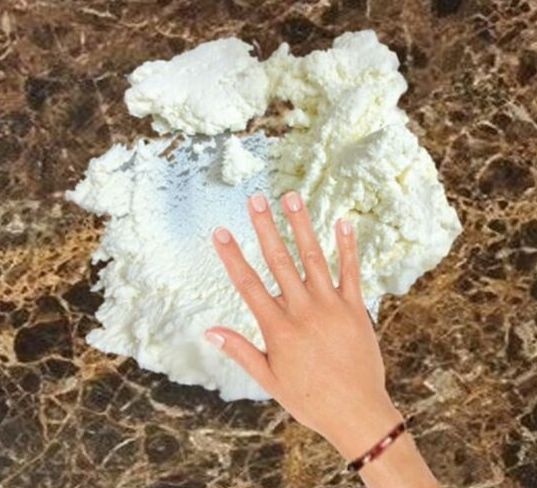
9. If you have a very moist chhena, when you mash the entire chenna will get
stuck to the counter but if you have nicely squeezed chenna then as you mash
by dragging your palms, your palms will automatically get greased by the fats
from the chenna, which aids you to mash and smoothen it better.
10. In case your chenna has become too dry or too hard add few drops of water to
make the chenna smooth.
11. If chenna is sticking on the counter then wrap the chenna in a towel and leave
for a while towel will soak the water.
12. Once you get a smooth chenna (paneer), bring together the mashed and
smooth chenna and make it like a dough.
smooth chenna and make it like a dough.
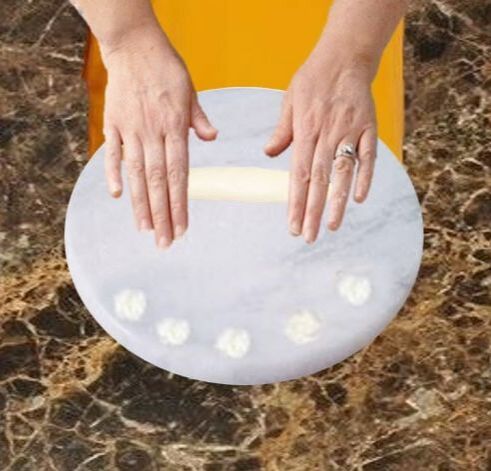
13. Roll the dough to make it smooth and divide the dough into 16 to 20 equal
parts without making the balls.
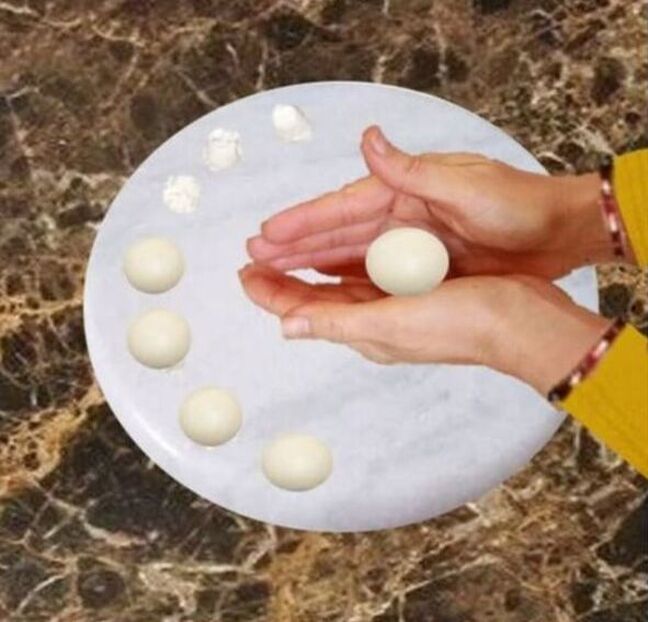
14. Take a portion of the dough and roll it in between your palm into a ball
without any cracks, or over the rolling board roll them in circular motion and
make a smooth and round ball.
parts without making the balls.
14. Take a portion of the dough and roll it in between your palm into a ball
without any cracks, or over the rolling board roll them in circular motion and
make a smooth and round ball.
15. Some Rasgullas do not appear to have a smooth outer appearance because
they may not have been pressed and mashed well, then each time you roll
the chenna mash chenna with the thumb in the palm and roll until you form a
round ball.
16 While rolling the balls if dough becomes dry then add few drops of water
in the dough and mix and knead to make it soft.
17. When making rasugalla balls if paneer is sticking in your hands, then grease
your hand a little that will help you to make smooth balls.
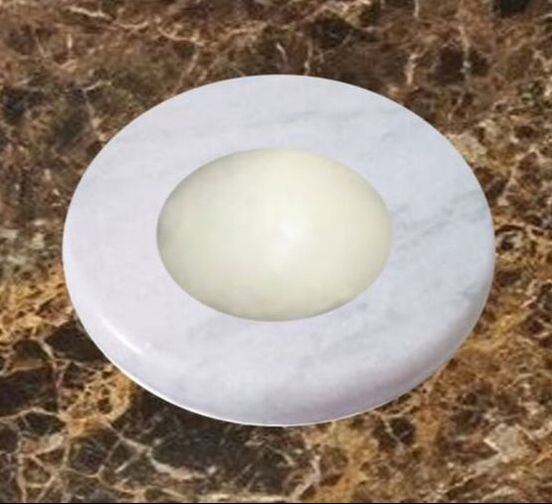
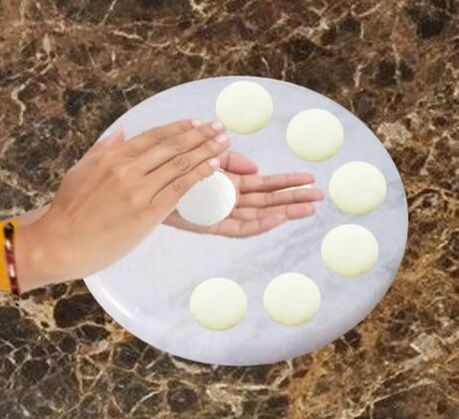
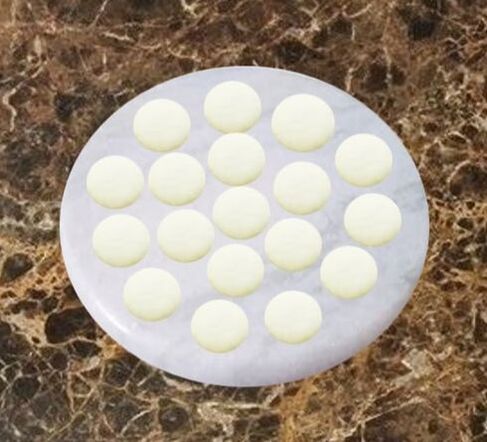
18. Now with your palms press the ball gently and make it like patties. There
should not be any cracks in the patties otherwise they will break while boiling
them.
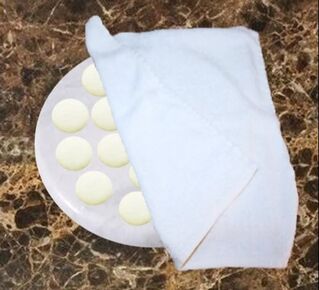
19. Cover the patties with a moist towel so that they don't dry.
20. While boiling Rasgulla's keep the Milk (Mali) warm.
20. While boiling Rasgulla's keep the Milk (Mali) warm.
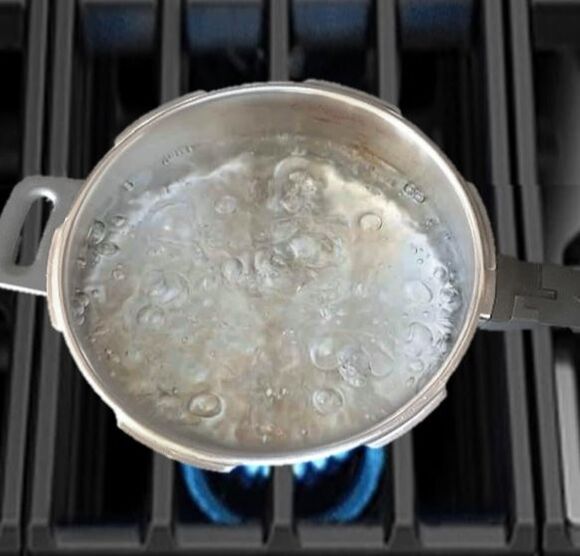
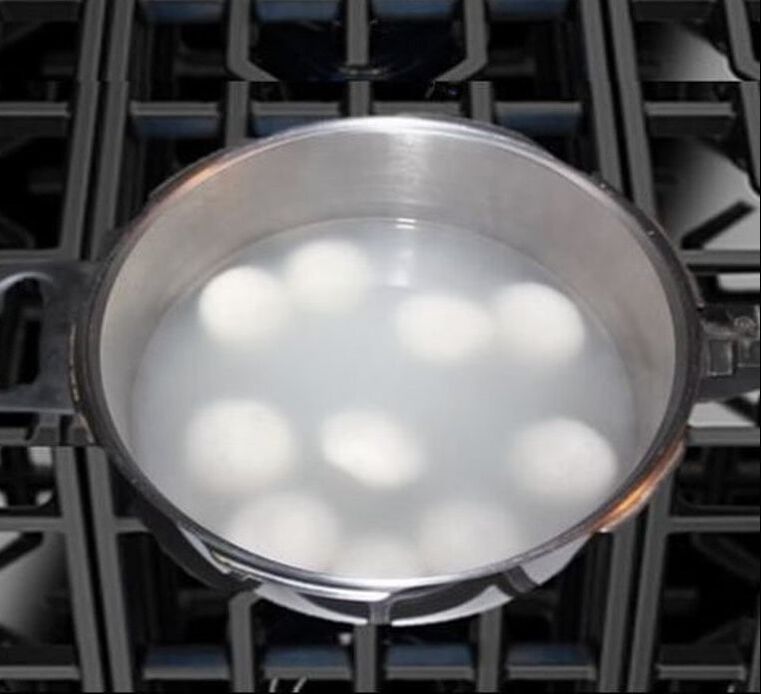
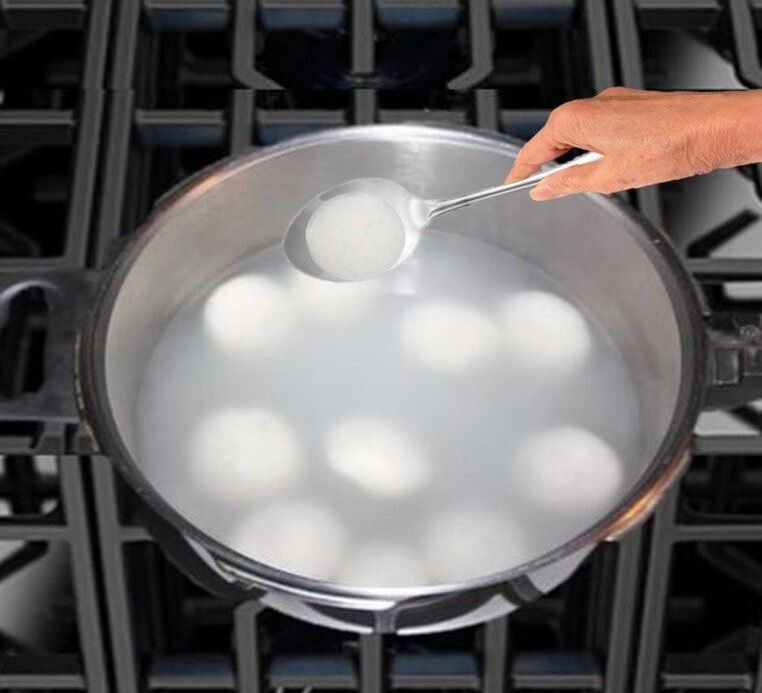
21. In a 4 quart pressure cooker add 6 cups of water and bring it to boil.
(I boil Rasgullas without sugar. Boiling Rasgulla in plain water makes it
easier for the Rasgulla to absorb water and cook thoroughly and they stay
white)
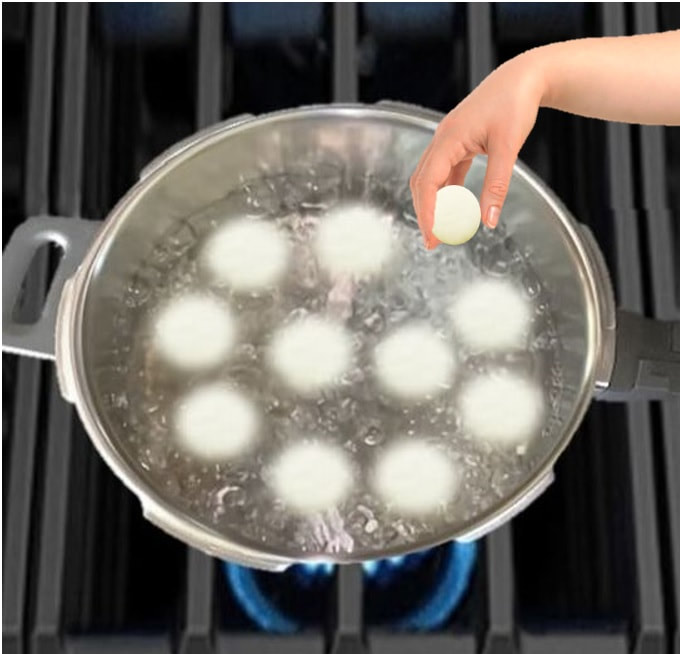
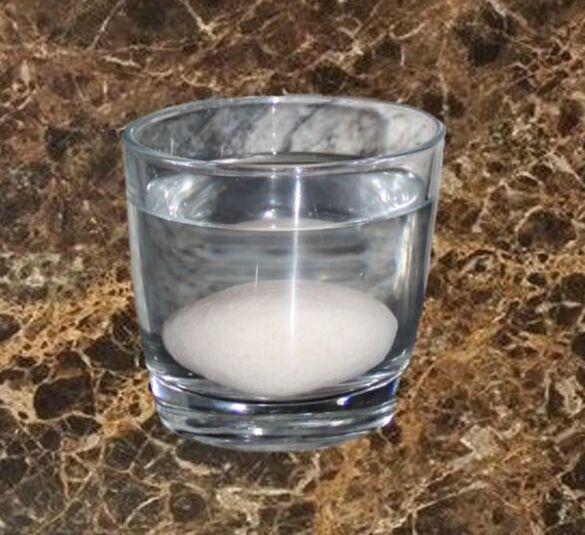
22. Gently drop one at a time 8 to 10 chenna patties into the boiling water.
(I boil Rasgullas without sugar. Boiling Rasgulla in plain water makes it
easier for the Rasgulla to absorb water and cook thoroughly and they stay
white)
22. Gently drop one at a time 8 to 10 chenna patties into the boiling water.
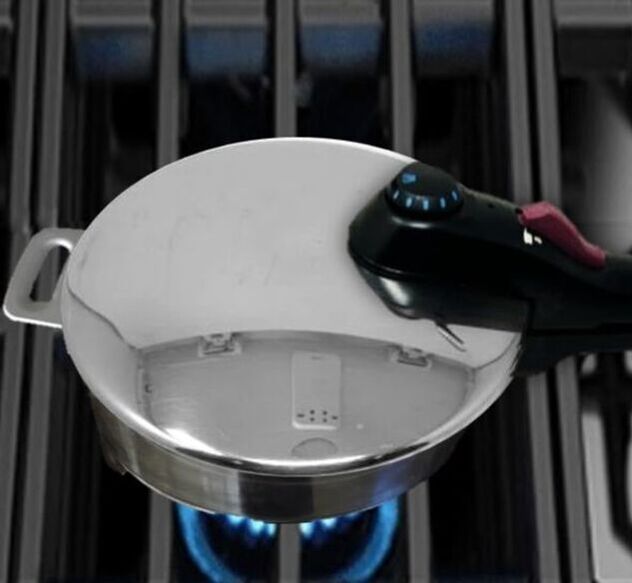
23.Close the lid of the pressure cooker with the weight & let the pressure build up.
24. Once the cooker starts making a noise from then count 7 minutes and turns
the heat off.
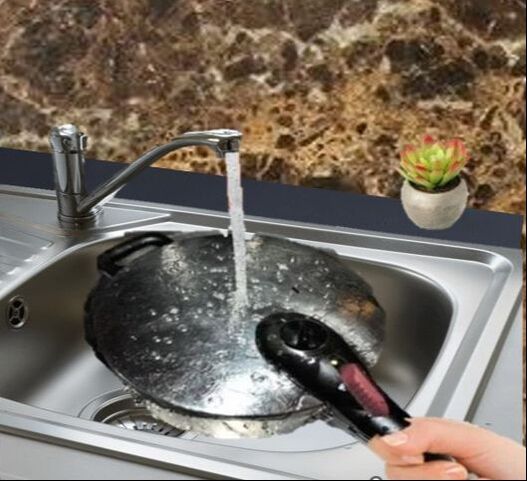
25. Release the steam from the pressure cooker by running the cold water in the
sink.
24. Once the cooker starts making a noise from then count 7 minutes and turns
the heat off.
25. Release the steam from the pressure cooker by running the cold water in the
sink.
26. Open the cooker and allow the rasgullas to settle down before touching
them. They have expanded to almost double their original size and will be
delicate when hot.
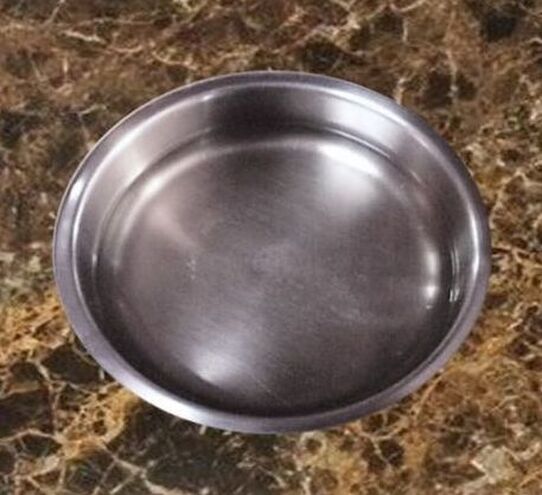
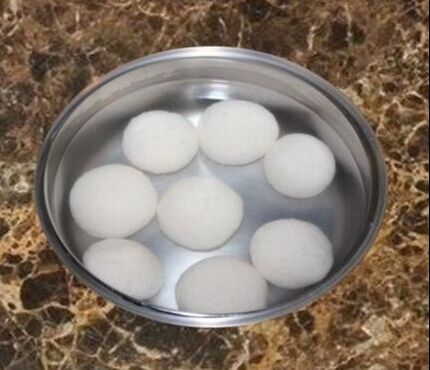
27. Take a bowl large enough to hold 8 to 10 Rasgullas so that they do not get
crowded in the bowl. Fill the bowl with cold water.
them. They have expanded to almost double their original size and will be
delicate when hot.
27. Take a bowl large enough to hold 8 to 10 Rasgullas so that they do not get
crowded in the bowl. Fill the bowl with cold water.
28. With a slotted serving spoon lift one Rasgulla at a time and gently transfer
into a bowl of fresh cold water. Handle Rasgullas gently because they are
delicate when they are warm and fresh.
into a bowl of fresh cold water. Handle Rasgullas gently because they are
delicate when they are warm and fresh.
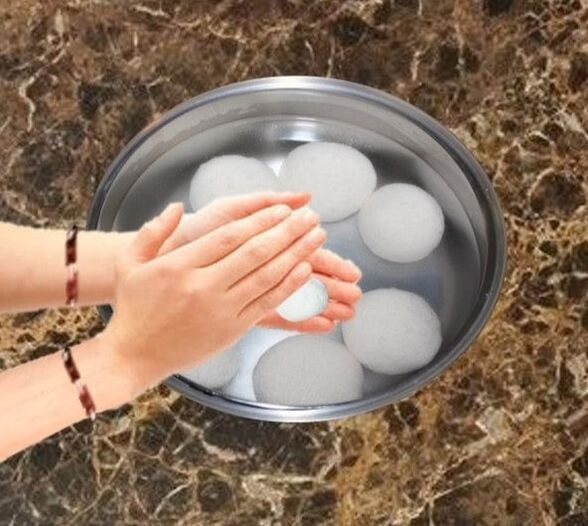
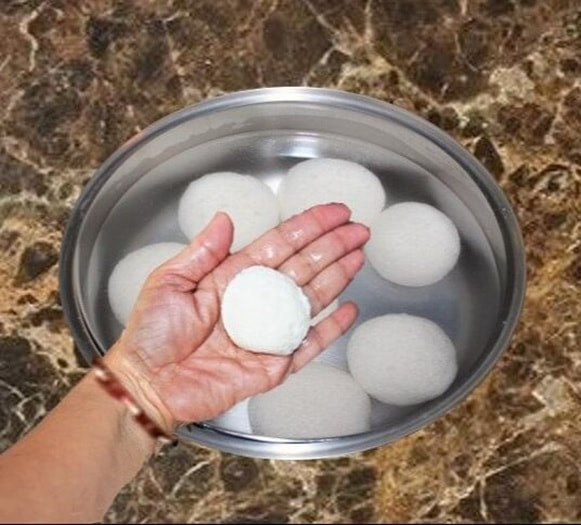
29. Once Rasgullas cool down take one Rasgulla at a time and gently squeeze the
fresh water out so that they can then absorb the sweetness from the Milk.
fresh water out so that they can then absorb the sweetness from the Milk.
30. Once you boil all the patties and transfer them into the milk, give a boil so
that patties absorb the milk.
31. Add few drops of rose essence and gently shake the pot to mix the essence.
Turn the heat off.
that patties absorb the milk.
31. Add few drops of rose essence and gently shake the pot to mix the essence.
Turn the heat off.
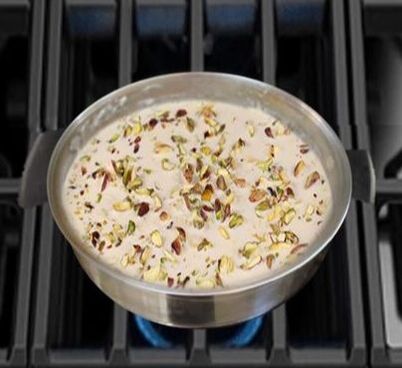
32. Sprinkle half of the sliced nuts and mix.
33. Once Rasmalai cool down transfer them to serving bowl and decorate them
with other half of sliced almonds and pistachio nuts and place them in the
refrigerator. Serve them chilled.
33. Once Rasmalai cool down transfer them to serving bowl and decorate them
with other half of sliced almonds and pistachio nuts and place them in the
refrigerator. Serve them chilled.
Tips:
1. If you have gluten allergy, then instead of all- purpose flour you can use
2 Tablespoon of rice flour.
2. Paneer could be prepared one or two days before making the Rasgulas. After
making paneer just place it in the refrigerator.
3. The success of your Rasgullas depends on how smooth you knead the chenna
dough. It should not be too firm or too soft.
4. When cheena has less moisture then Rasgulla becomes rubbery, dense, hard
and shrink after cooking and cooling.
5. If there is too much water or moisture in cheena then rasgulla disintegrates or
breaks while cooking.
6. The chenna balls should not have any cracks otherwise they will break while
boiling them.
7. When boiling Rasgullas make sure you have enough water otherwise Rasgullas
will become flat.
8. Boiling Rasgulla in plain water makes it easier for the Rasgulla to absorb
water and cook thoroughly and they stay white.
9. Do not boil too many balls at one time because they will squish with each
other and would not have enough space to expand and remain hard.
10.After boiling the rasgullas if you keep them in fresh cold water, they will retain
their shape. But if you keep the boiled, spongy rasgulla in the syrup on top of
one another they will become flat and lose their round shape.
11. To check if the Rasgullas are done there are two ways. First with a spoon take
one rasgullas and place it in a bowl of water if the Rasgulla sinks to the bottom
and stay there it is cooked.
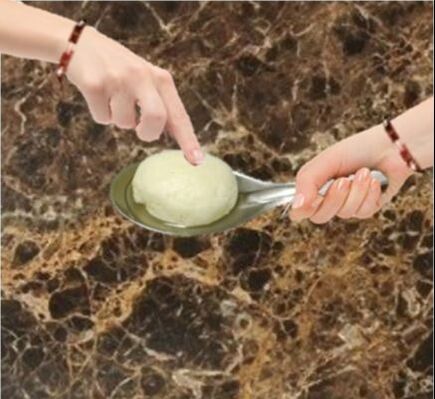
12. Second method is to press a small portion of the Rasgulla with your finger if
the pressed portion bounces back to its original shape it is done. You should
check it right after you open the pressure cooker; if Rasgullas are not done
you need to cook them further.
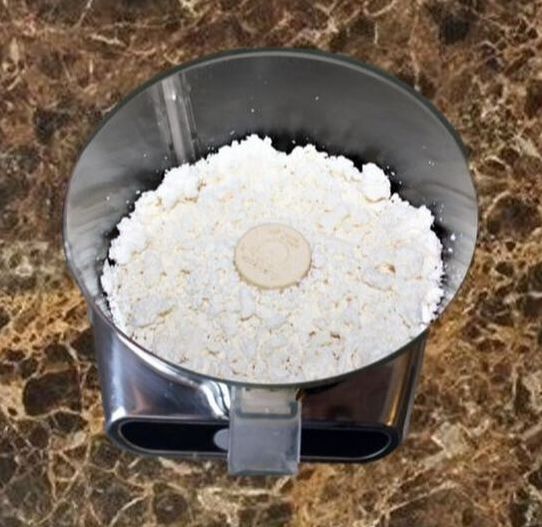
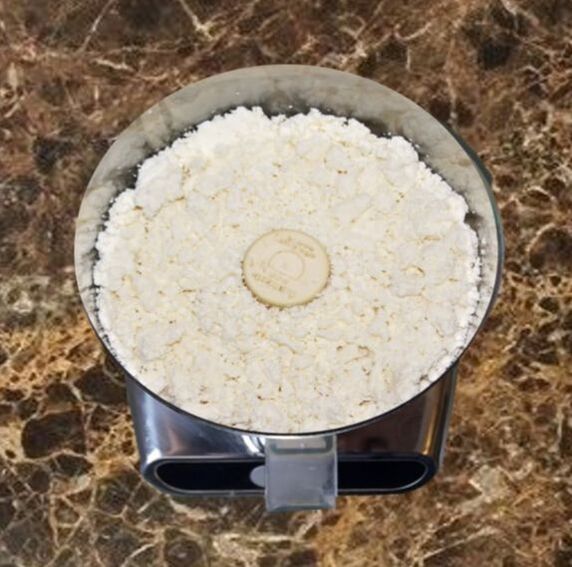
Directions for making the chenna dough with food processor:
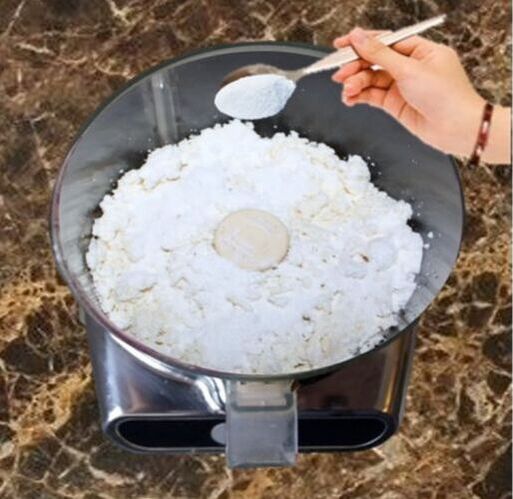
1. Add all the chenna, all- purpose flour in the food processor and run it for less
than a minute.
2. If chenna become too dry or too hard then add few drops of water or as
required and run it until chenna become soft and smooth and there are no
lumps left.
3. Do not over knead because the oil will come out form the chenna and you will
not be able to make smooth balls.
Directions for making the Rasgullas without the pressure cooker:
If you do not have the pressure cooker or you prefer to cook in a sauce pan then
you may.
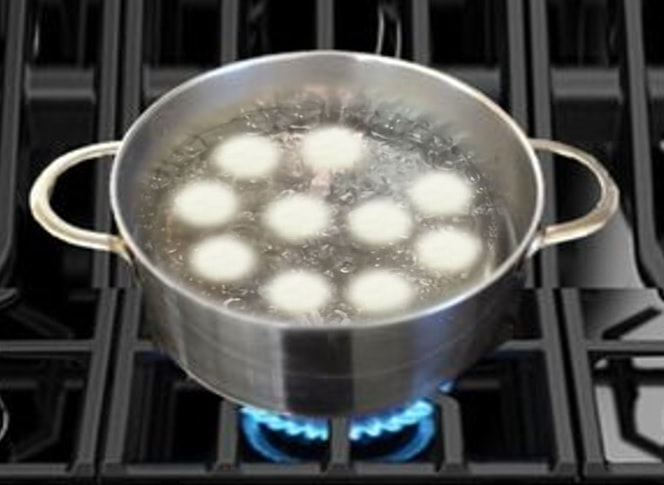
1. Take a big saucepan and add 6 cups of water and bring it to boil.
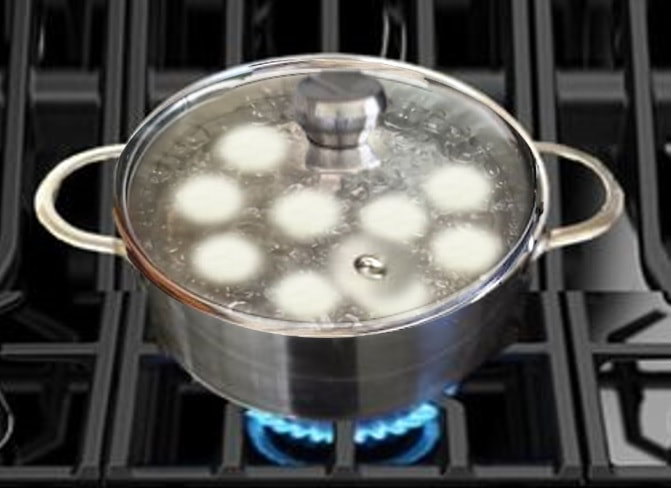
2. Gently drop 8 chenna patties into the boiling water, cover the pan with vent
hole lid and cook for 15 to 20 minutes on medium heat, turn the heat off.
(If you do not have cover with vent hole then leave the cover little open. So
that lot of bubbles come up and that bubbles cooks Rasgullas)
3. Patties will expand in to double the size. Let the patties settle down then with
the slotted serving spoon lift one patty at a time and transfer them to the
premade thick milk and repeat until you boil all the chenna patties.
4. Once you boil all the chenna patties and add them into the milk, then place the
pan over the stove on a low heat and give a boil so that patties absorb the milk,
turn the heat off.
Please take the time to let me know what you think about my recipe. Your comments would be helpful to me to improve the recipe.
Thank you
Geeta Seth
Thank you
Geeta Seth
Other recipes:
Rasgulla Vermicelli (Seviyan kheer)
Gulab jamun Kheer (Rice pudding)
Kala jamun Carrot halwa (Gajar halwa)
Sooji ka halwa lauki ka halwa
(Cream of wheat halwa) (Bottle gourd or ghiya ka halwa)
Rasgulla Vermicelli (Seviyan kheer)
Gulab jamun Kheer (Rice pudding)
Kala jamun Carrot halwa (Gajar halwa)
Sooji ka halwa lauki ka halwa
(Cream of wheat halwa) (Bottle gourd or ghiya ka halwa)

